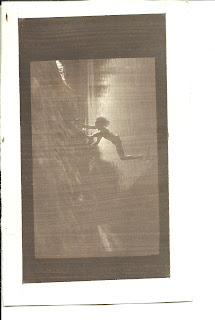
The Van Dyke process originated in the late 1800’s
This process produces brown tones with a longer tonal scale than most other processes. The work area must be free from UV light but this process can be done under incandescent lights. I found this article by Peter J. Caluori, to be a very thorough look at the Van Dyke process: http://www.shadesandcolors.com/vdarticle.html.
Process:
The Van Dyke process can be used on a number of materials such as paper, fabric or wood. Step one is to coat the material. Three solutions were made with distilled water
Solution A
Ferric Ammonium Citrate 9.0 gm
Distilled Water 33.0 ml
Solution B
Tartaric Acid 1.5 gm
Distilled Water 33.0 ml
Solution C
Silver Nitrate 3.8 gm
Distilled Water 33.0 ml
Solutions A and B are combined then Solution C is added slowly while stirring. The sensitizer should be aged for a few days in a brown bottle in a dark place. To sensitize the paper, we brushed the mixture onto the paper. The paper was then dried with a blow dryer. I exposed my paper outside in UV light, in a frame with a negative for about 10 minutes.
After, the print brought inside to be fixed. First was a rinse of water and citric acid for 5 minutes. The print was then placed under running water for 2 minutes, then placed in a 3% hypo mixture for 1 minute and for another minute in a separate 3% hypo mixture. The final wash was in water for about 40 minutes.
I was unhappy with the quality of my prints. This could have been due to a couple reasons. The coating must be applied very evenly to the paper or brushstrokes can be seen on the final print. Another difficulty was that the negative did not have enough contrast to transfer fine details to the print. The quality could have also been improved by increasing the exposure time for more detail to develop if the negative had better contrast. The below Van Dyke print has great detail and tonal quality.
This video is a very quick view of the process with a look at the actual prints at the end.


No comments:
Post a Comment