Monday, May 16, 2011

Salted Paper II

History

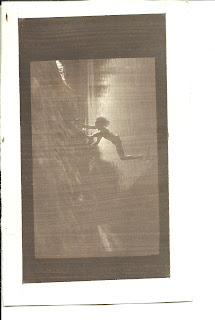
William Henry Fox Talbot invented the photogenic drawing process on salted paper in 1834.  The photogenic drawing is a monochromatic image that is formed when a paper is coated with silver halide salts and exposed to light. Talbot’s first prints were silhouettes of flowers, plants and lace. The object was a white or cream color against a matte background of purple or brown.  Salted paper prints did not appeal to the public due to their matte surface texture and soft image.  However, this process was used by amateurs to capture prints in botany and travel photography.

http://t2.gstatic.com/images?q=tbn:ANd9GcShZFPuknWKCjsGfD2LiT3KI0goSKTNfuFqQ-nEaYUewLouwxhNJw
Process
            The salted printing process is made up of 2 parts: coating the paper and fixing the image.  A weak solution of sodium chloride is mixed and fine writing paper is immersed into the solution.  Three different solutions to create the sensitizer.
The arrowroot coating consisted of 4g arrowroot paste, 119mL water, 4g NaCl and .5g citric acid. The water was heated and the arrowroot paste, NaCl and citric acid were then mixed into the water.  The mixture was then allowed to cool.  Two pieces of water color paper were coated with two coats of the arrowroot coating.   
The gelatin coating recipe included 125mL water, 1g gelatin, 2.5g citric acid and 2.5 g NaCl.  These ingredients were combined and the mixture was heated in a double boiler .  Two coats of the warm solution were applied to two pieces of water color paper.
The final solution was an albumen mixture prepared in a group.  This recipe included 500mL egg white, 3mL vinegar and 7.5g NaCl. These items were combined and shaken to a white froth.  The solution was left to set for two days then strained.
100% rag paper was then coated with the albumen mixture.  Another two pieces of paper were coated in albumen a second time then, once dried, the paper was dipped into an alcohol bath then again dipped in albumen.
The object or negative is then contact printed onto the sensitized paper.  Once exposed, the image begins to appear instantly and the actually exposure time is only about 1 minute.  Once the image has been sufficiently exposed, Talbot used a saturated salt solution to fix the image onto the paper.  He found that table salt provided the best results when stabilizing the image by reducing the silver salts’ sensitivity to light.  Even though how simple this process seems, there are many variables which can affect the final image such as solution concentrations and impurities in the paper.  The image is infused into the paper fibers because the solution is applied directly to the surface of the paper. 
My prints did not turn out well at all.  I believe this was due to the length of time between coating the paper and when I finally exposed the image. 
The process tends to yield prints which have very low contrast.  Negatives with higher contrast should be used in the process to improve the final image.
            This website also provides a few toning recipes for salted paper prints. http://steveanchell.com/index.php?option=com_content&view=article&id=34%3Asalted-paper&catid=15%3Aoutput-darkroom-and-lightroom&Itemid=39


Tuesday, May 10, 2011

Cyanotype

In 1842, Sir John Herschel discovered the photographic process now known as the cyanotype process or blueprint process. This process was the first successful non-silver photographic printing process. Cyanotypes are produced by light sensitive iron salts instead of silver. Cyanotypes were used in the first photographically illustrated book. Anna Atkins was the first person to print and publish her own book which was entirely illustrated by photography, more specifically cyanotypes.  Three volumes of Atkins' book Photographs of British Algae: Cyanotype Impressions were produced between 1843 and 1853. The following prints are examples of cyanotypes from Atkins’ book. More examples from her book can be found on this website: http://www.photography-news.com/2011/03/remembering-anna-atkins-author-of-first.html


The cyanotype process was relatively easy and produced prints with great contrast.  First, we coated 100% rag paper with the cyanotype solution. Next, we put our paper and negatives in the printing frame and exposed the paper to the sunlight for about 15 minutes. The print was then washed in water for about half an hour.

Cyanotype Recipe:
Solution A was a mixture of 25 g Ferric ammonium citrate (green) and 100 ml water. Solution B was a mixture of 10 g Potassium ferricyanide and 100 ml water. Equal parts of both solutions are mixed to form the final cyanotype solution.

3 different toning solutions were available:
1) tea: tea and water
2) reverse: tea then strong ammonia
3) redevelopment: weak ammonia, rinse in water, tea

The original print turned out really nice. It had a lot higher contrast than the other processes we used previously and the blue color was more appealing to me. The prints weren’t streaky after they were developed and looked clear and even. I didn’t have nearly as many problems with coating in this process compared to others such as albumen.

I found it very interesting that this process was not very popular when it was first discovered. Here is a website with a variety of cyanotype images: http://flickrhivemind.net/Tags/cyanotype/Interesting

Van Dyke

The Van Dyke process originated in the late 1800’s

This process produces brown tones with a longer tonal scale than most other processes.  The work area must be free from UV light but this process can be done under incandescent lights.  I found this article by Peter J. Caluori, to be a very thorough look at the Van Dyke process: http://www.shadesandcolors.com/vdarticle.html.

Process:
The Van Dyke process can be used on a number of materials such as paper, fabric or wood. Step one is to coat the material. Three solutions were made with distilled water

Solution A
Ferric Ammonium Citrate    9.0 gm
Distilled Water                  33.0 ml

Solution B
Tartaric Acid                      1.5 gm
Distilled Water                  33.0 ml

Solution C
Silver Nitrate                       3.8 gm
Distilled Water                  33.0 ml

Solutions A and B are combined then Solution C is added slowly while stirring.  The sensitizer should be aged for a few days in a brown bottle in a dark place. To sensitize the paper, we brushed the mixture onto the paper. The paper was then dried with a blow dryer. I exposed my paper outside in UV light, in a frame with a negative for about 10 minutes.

After, the print brought inside to be fixed. First was a rinse of water and citric acid for 5 minutes. The print was then placed under running water for 2 minutes, then placed in a 3% hypo mixture for 1 minute and for another minute in a separate 3% hypo mixture. The final wash was in water for about 40 minutes.

I was unhappy with the quality of my prints.  This could have been due to a couple reasons. The coating must be applied very evenly to the paper or brushstrokes can be seen on the final print. Another difficulty was that the negative did not have enough contrast to transfer fine details to the print. The quality could have also been improved by increasing the exposure time for more detail to develop if the negative had better contrast. The below Van Dyke print has great detail and tonal quality. 


This video is a very quick view of the process with a look at the actual prints at the end.
http://vimeo.com/17762049

Here are a couple of my prints using the Van Dyke  process:


Monday, May 9, 2011

albumen_prints

The albumen print process includes the use of egg whites to coat the paper which reduced the roughness and porosity of the surface allowing for finer detail in photographs.  This process was invented by Louis Désiré Blanquart-Evrar in the mid-nineteenth century. The albumen prints were inexpensive and helped bring photography into the masses.
The following is an albumen print that can be found in the George Eastman House collection. The photograph of Juneau and Douglas Island, Alaska, was taken by Isaiah West Taber in 1885.

Process: The 100% cotton rag paper is first coated with an albumen solution and dried. The paper is then coated with a 3% salt solution. Once the salt solution dries, 2 coats of silver solution are applied. Once you expose the paper, it is fixed in a hypo solution and then washed.
My prints didn’t turn out very well because I think I let the paper sit too long before applying the salt and the silver solutions.
The George Eastman house will be holding a workshop giving individuals an opportunity to experiment with the albumen print process. More information about the workshop can be found at the following link: http://www.eastmanhouse.org/events/detail/photo-workshop-10-2011.


My albumen prints didn't seem to come out at all. I think it was because I coated my paper a couple weeks in advance. I didn't think that it would have an effect on the paper until I coated it with a salt solution and silver solution but I was wrong!

Monday, April 25, 2011

this is awesome!

The Magic Mirror of Life: an appreciation of the camera obscura

http://brightbytes.com/cosite/usamaplist.html

camera_obscura


In the 10th century, writings from an Arabian scholar Hassan ibn Hassan (also known as Ibn al Haitam) describe what is now known as a camera obscura.  A camera obscura is simply a dark box in which light rays from a scene pass through a small hole or lens to create an upside-down image. Early models were as large as rooms but improvements to portability and image quality have been made over the past centuries.  
In the 1600s, a lens replaced the hole and produced sharper and brighter images. The lens can restrict the size of the camera obscura because the size of the lens dictates the focal length of the image. The more detail and brightness you want, the larger the diameter of the lens must be to obtain the image.
I made my camera obscura out of wood with a small pinhole opposite a frosted glass plate.  When held up to light, the image can be seen projected upside-down onto the glass plate. The lens I used was a magnifying glass. The lens allows more light into the camera and provides a brighter, clearer image.

camera obscura on BBC!

Sunday, March 27, 2011

calotype_process

http://www.youtube.com/watch?v=oD30ajWuHUI

photogenic_drawing

This weeks lab had extremely different results than last week, the prints were actually visible with a reasonable exposure time!

Photogenic drawing, also known as a calotype, was first announced by William Henry Talbot in 1839. This process is very similar to anthotypes, but with the addition of silver iodide which greatly changes the results of the prints. The prints were first coated with varying amounts of NaCl and AgNO3 and then exposed outside under direct sunlight. After the prints were exposed, the silver iodide decomposes, and any that remains needs to be washed off. In the case of the class experiment, the prints were then washed in a salt water solution so that the image would "fix" to the paper.

After our experiment a few conclusions can be drawn from the different solutions of NaCl and AgNO3 that were used. The heavy weight paper used in our tests held up much better than lighter weight paper and resulted in better quality prints just because the paper didn't disintegrate. Another conclusion is that the stronger the solution, and the more coats of it, yielded darker exposures.

photogenic_drawing

 
Here are the boards from the second lab, photogenic drawing. This process yielded more visible results then the previous anthotype experiments

anthotypes

The first lab that we started working on had to deal with anthotypes. This lab will continue throughout the quarter and I am excited to see the results of this process.

Here are some pictures of what my prints may turn out like:


The original process was created by Sir John Herschel in 1842. It involves using plant matter, such as raspberry, strawberry, beets, flowers, and the like. The process involves crushing whichever plant matter you choose and then applying it to dry paper. After the paper is evenly coated, objects are used to cover up certain sections of the paper while the exposure takes place. Although this is a very interesting process, it is a very slow one. The prints are expected to take weeks to develop!

http://www.youtube.com/watch?v=g6E193iGgW8